*The 2-Way recliner brackets fit all 981 and 991.1 model seats and beyond*
**The LWBS recliner brackets fit 991.1/991.2 GT3, GT3RS & 981/718 GT4 model seats**
required tools & hardware
***DBJ is not responsible for damage to you or your vehicle by installing our products. Avoid improper installations that can lead to damage by using a professional for all installations.***
TOOLS REQUIRED INCLUDED HARDWARE
6mm Allen 2x M10X25 Screws
8mm Allen 2x M10 Flange Nut
15mm Wrench
16mm Wrench
ALSO REQUIRED FOR 2-WAY SEATS
10mm Socket or Wrench
T30 Torx
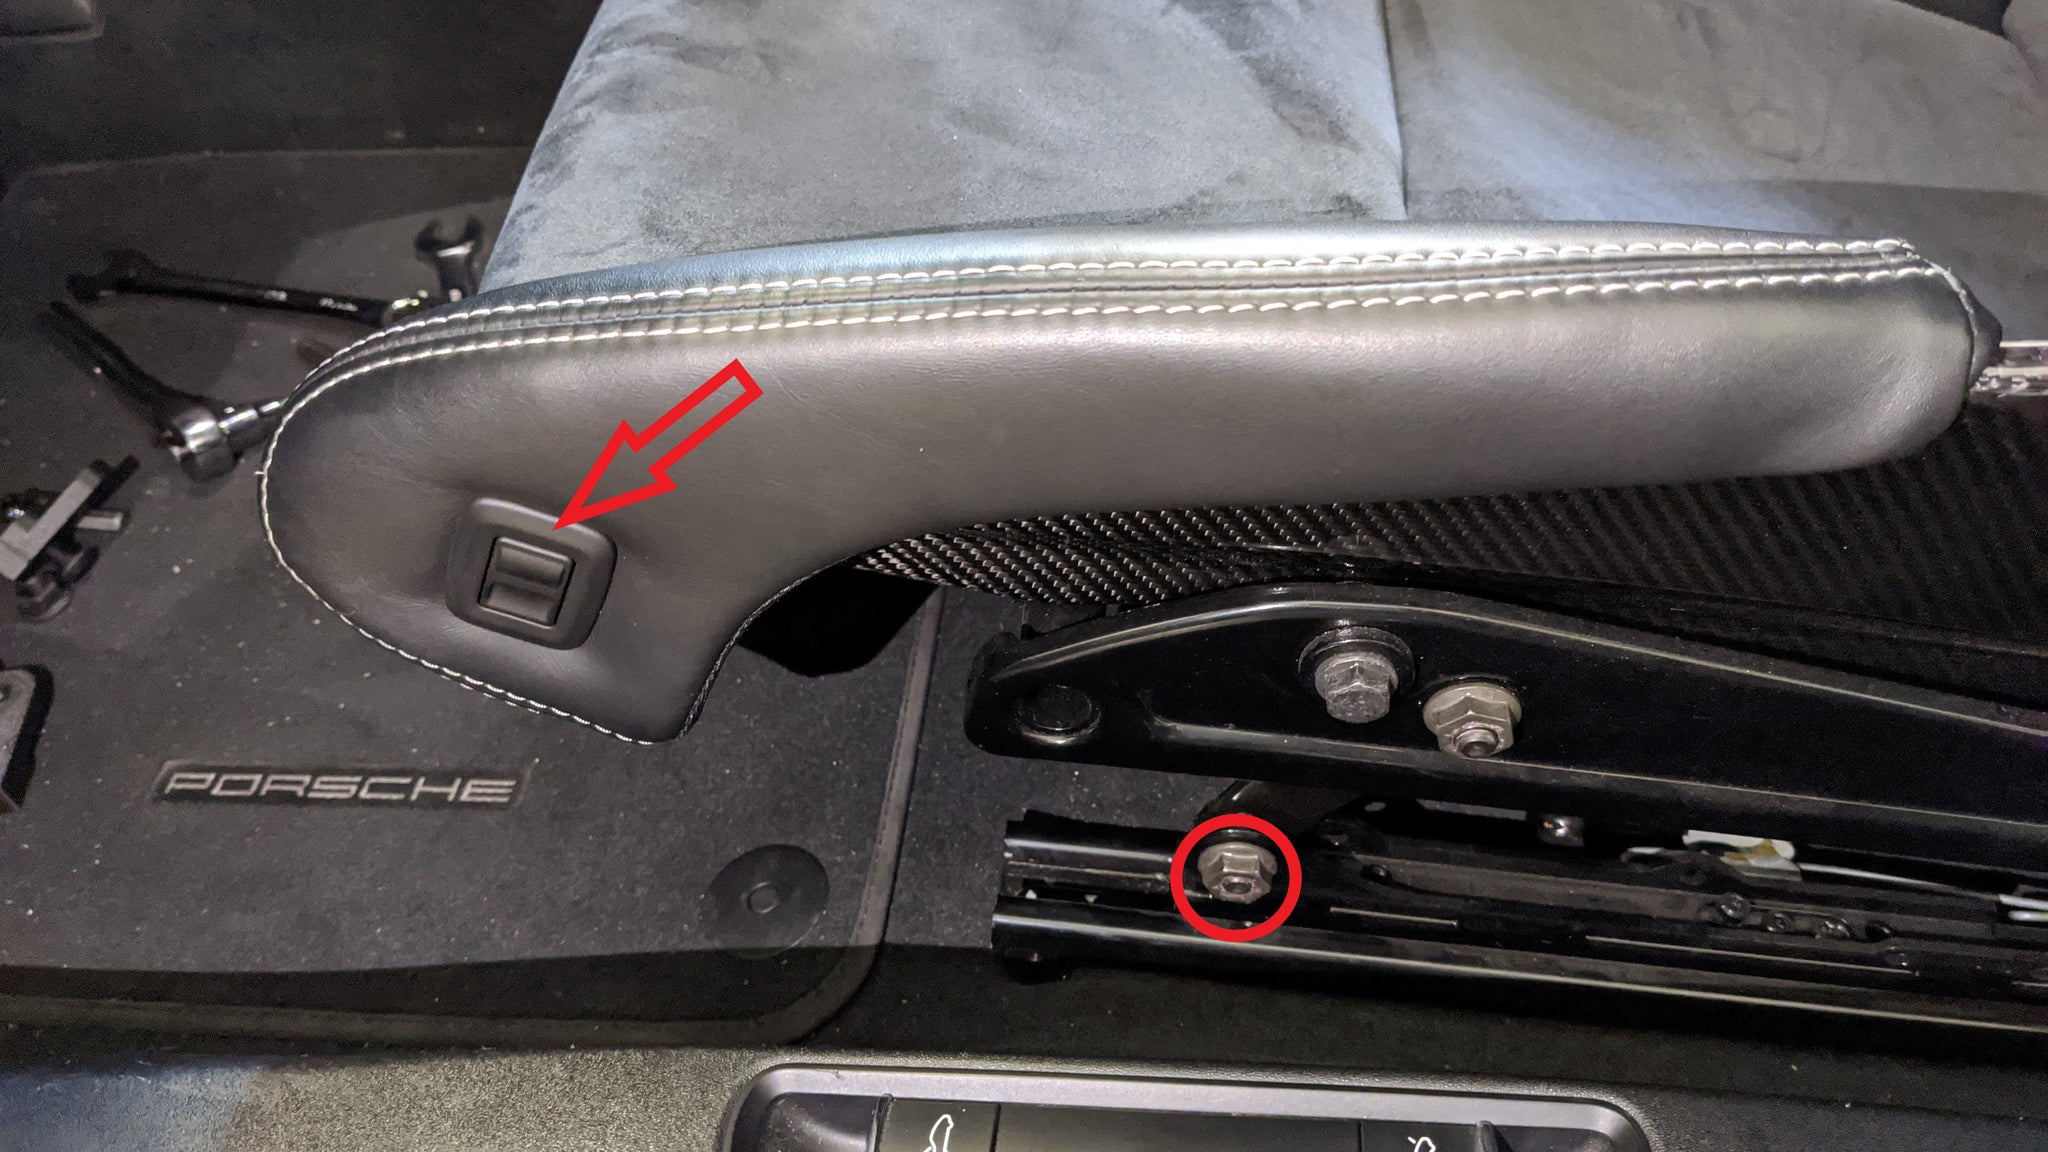
raise up the seat
Start by raising up the seat as high as you can to give more clearance to access the bolts under the seat. This can be done by pushing the button pointed out by the red arrow in the picture to the left.
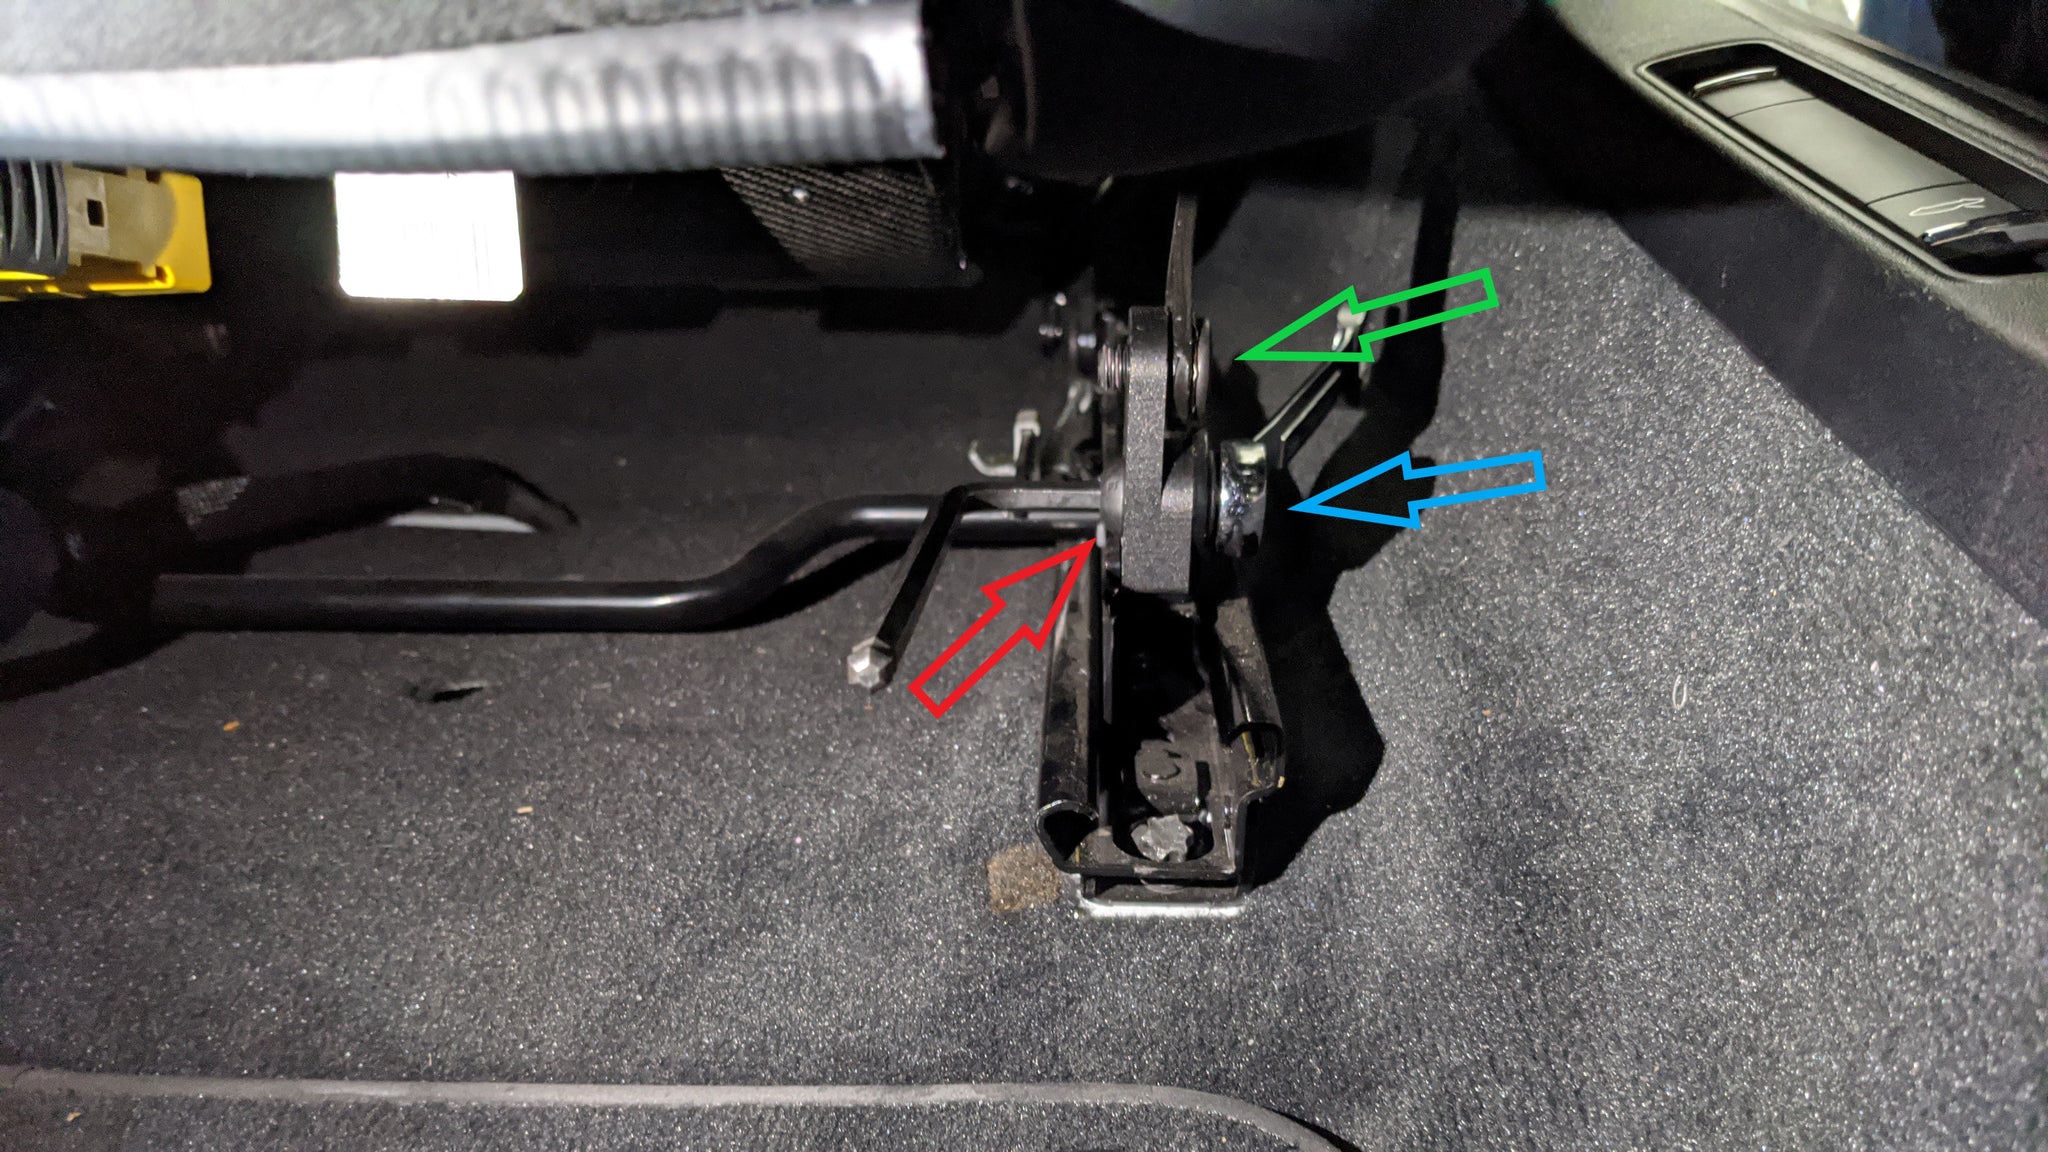
remove the oem bolt & nut
Next remove the OEM bolt and nut. This requires an 8mm allen and a 16mm wrench. Place the 8mm allen into the bolt pointed out by the red arrow in the right picture. The wrench goes on the nut pointed by the blue arrow in the right picture. You can also see a better view of this nut in the picture above (circled in red). Once the nut is loose, you should be able to remove the nut by hand.
For 2-Way seats you will require a T30 torx and a 10mm wrench to remove the original hardware.
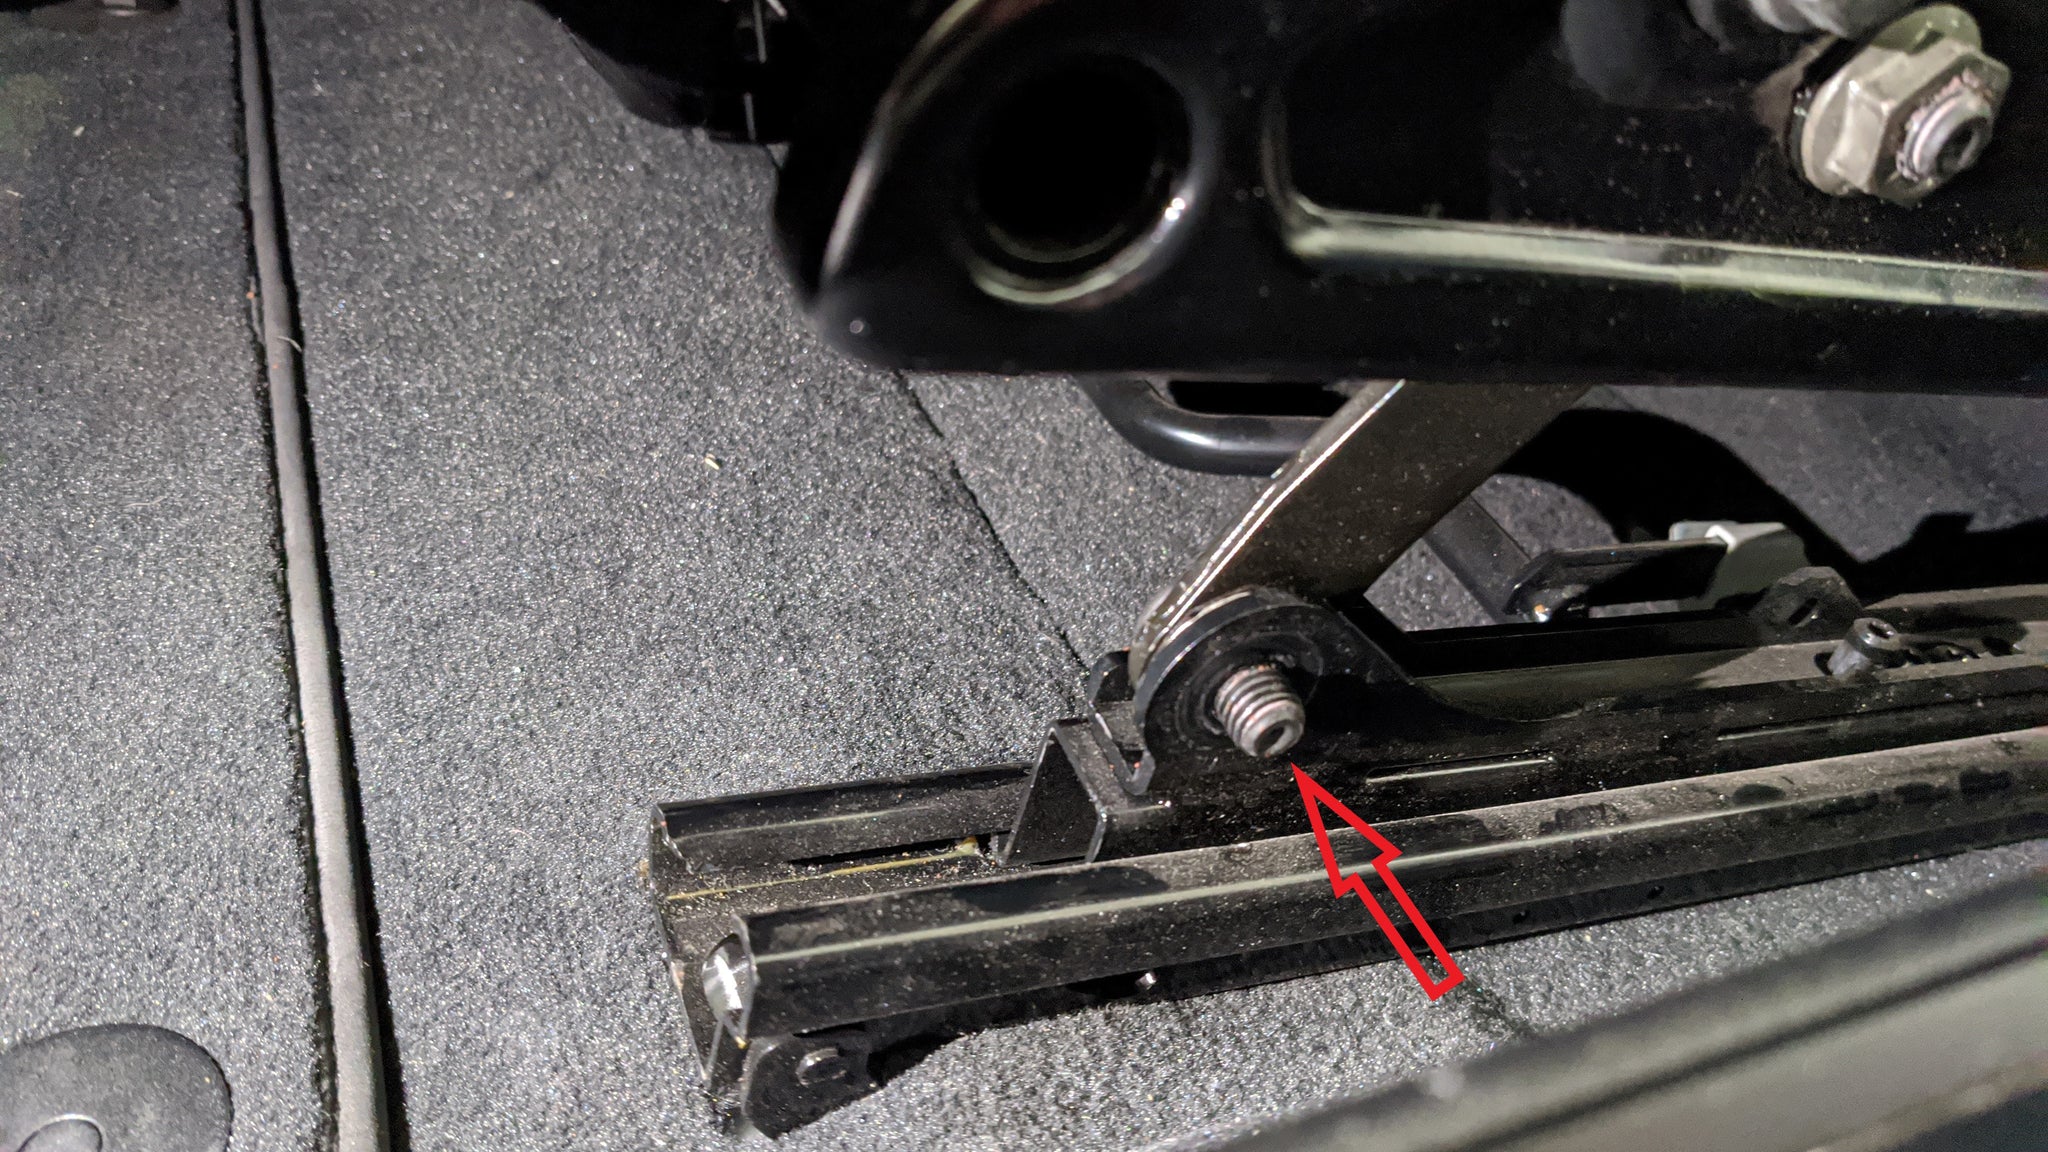
To remove the OEM shoulder screw, You may need to push or knock the bolt lightly with a hammer to loosen the shoulder. Another method is inserting the 8mm allen and pushing on the screw in the direction of the red arrow (right picture) while twisting left and right. Repeat these steps for the other side of the seat. Everything is identical just mirrored. Make sure to keep the OEM shoulder screws and nuts in a safe place. We will reuse them to secure the seats to the recliner bracket.
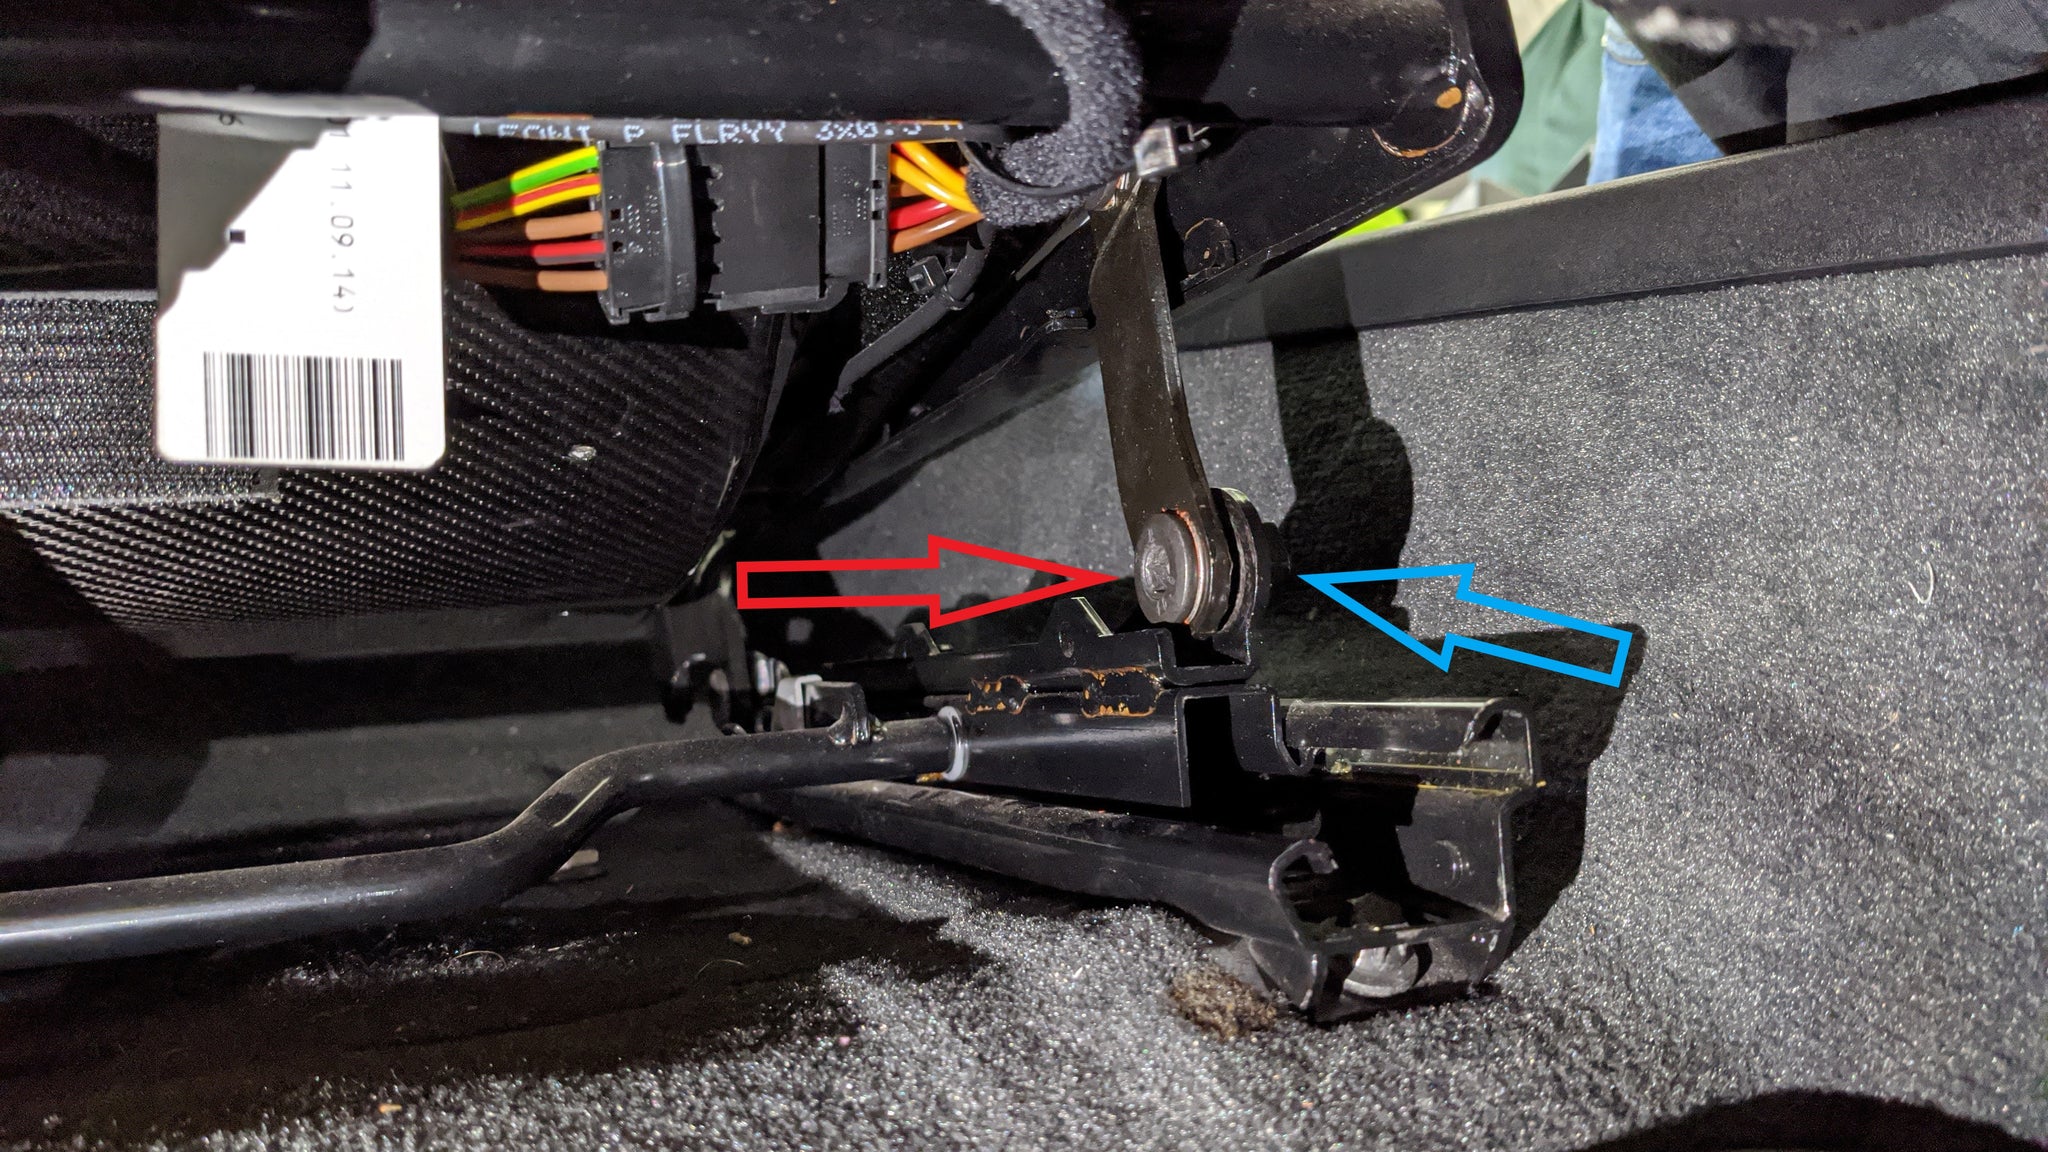
insert the recliner brackets
With the OEM shoulder screw and nut removed, the seat should be able to tilt back. Tilt the seat back a little bit and insert the bracket as shown in the picture to the left. The holes where we just removed the OEM screws should line right up with the hole in the thicker section of the recliner bracket. The OEM seat bracket should also sit right above the thicker section of the recliner bracket. Insert the supplied M10 screw where the red arrow is pointing. Place the supplied 10mm flange nut on the opposite end (blue arrow). The new M10 screw uses a 6mm allen and the new M10 flange nut uses a 15mm wrench. Line up the OEM bracket hole with the top of the recliner bracket hole and insert the OEM shoulder screw.
For the 2-way seats, use the OEM nut and screw on the bottom of the recliner bracket and the supplied
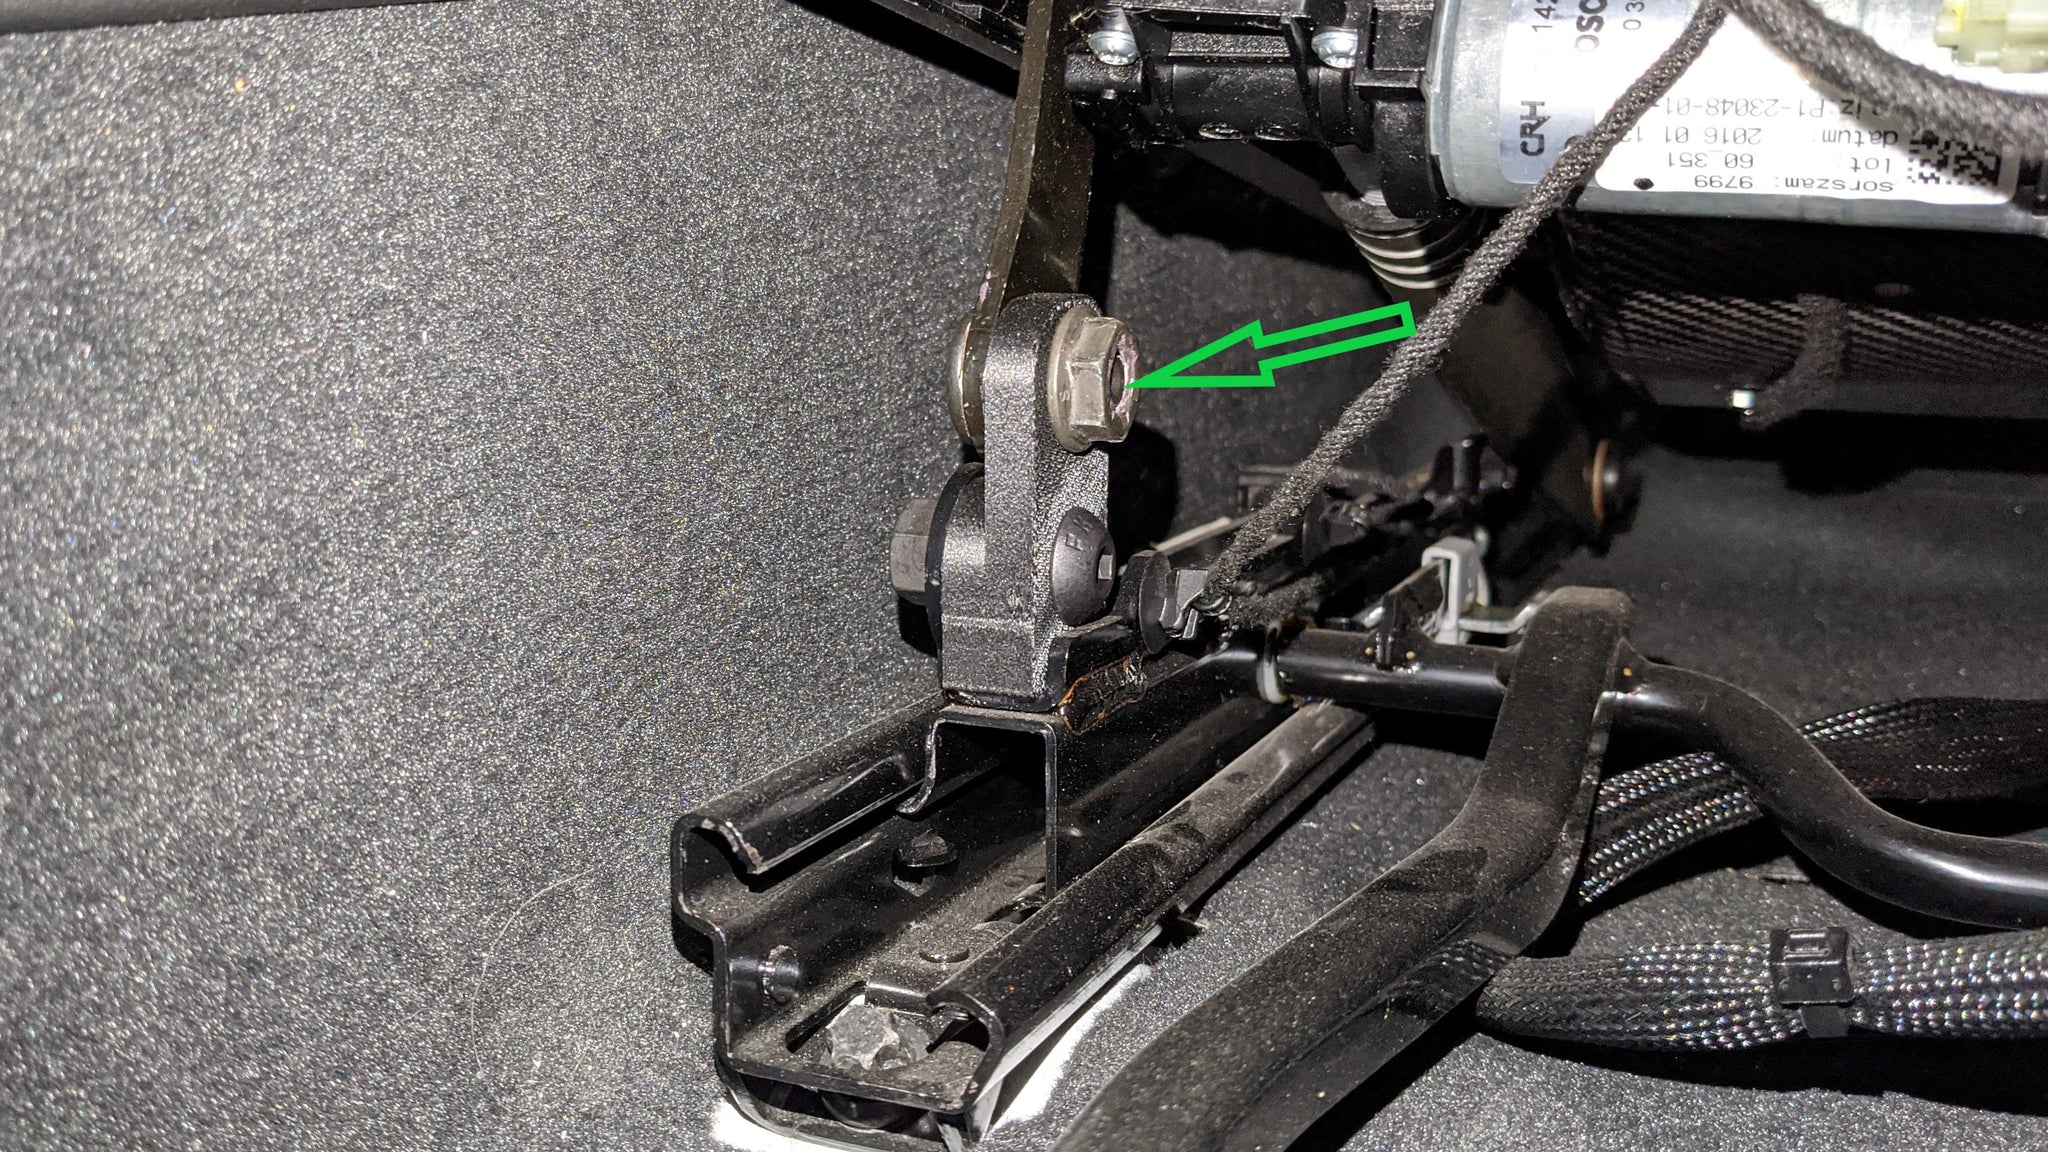
Finishing up
Finally put the OEM nut onto the OEM shoulder screw as shown in the right picture (green arrow). The shoulder screw may take some pressure to push through the OEM bracket enough for threads to catch the OEM nut. Double check the positioning of both recliner brackets when all fasteners are hand tight. They should fit in easily and the seat brackets should line up. Once both sides have been checked, torque down all the nuts and bolts.